


How to Make an Ikea Kitchen Look Custom
- Tabitha Lane
- Apr 14, 2018
- 5 min read


This post has been a LONG time coming. We have been renting for so long and always play this game where if I owned the house this is how I would design it but this is the first time I've ever gotten to put those thoughts into action! I cannot tell you how excited I am about this reveal!
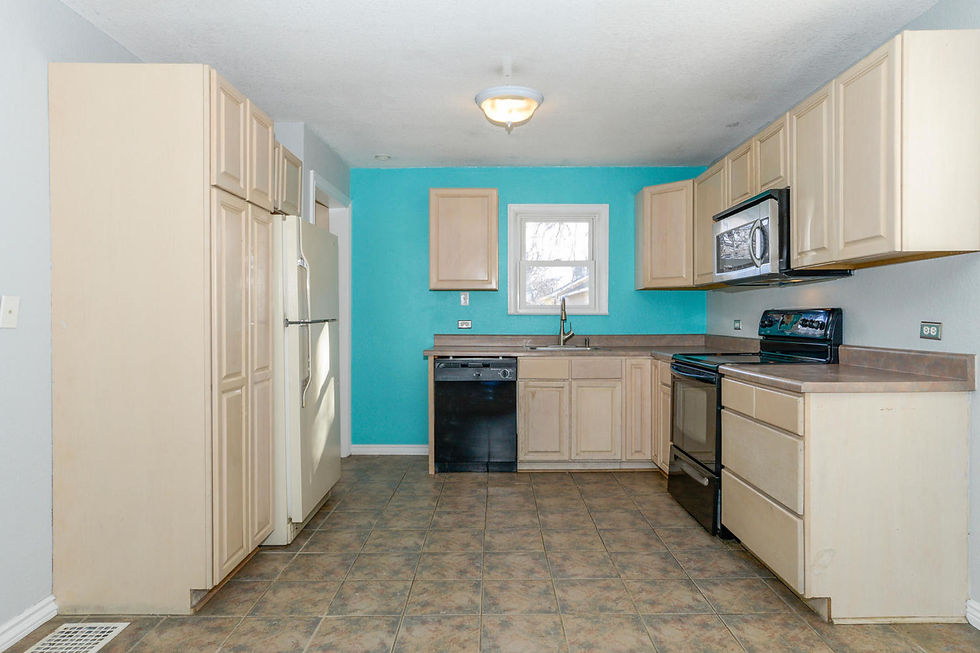
We bought our house almost exactly a year ago and I can't really put into words the transformation that it's taken. Even uploading these pictures of what it looked like before shocked me a little bit. I almost can't believe we bought the house when it looked like this, but the housing market is crazy in Denver so when we found this place in a neighborhood that we loved AND in our price range we jumped first thought later. This tile was a biiisshhhh to rip up but that's another blog post for another day.
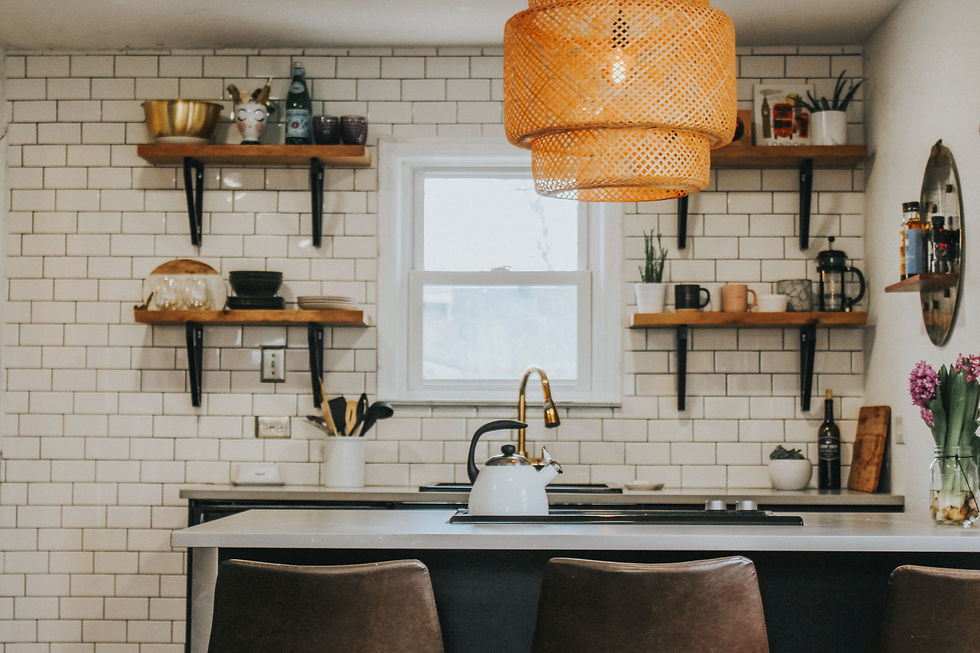
There were a lot of issues with this kitchen (ugliness being the main one) but one thing that I HATED was that there was no separation between the living room and the kitchen. The L-shape also left a lot of wasted counter space and because there is no dining area in the house I knew that I wanted figure out a way to create some seating. In the end we decided we were going to have to gut the whole kitchen and start from scratch.
I knew from the beginning that I wanted an Ikea kitchen because the storage options can't be beat and since its such a small space I wanted to make the most of it. You can check out our post about designing and ordering our Ikea cabinets here! I also knew that I didn't want to do white cabinets because it's a small space so I looked for ways to create drama wherever I could.
So are you ready to see it?


Shop The Details
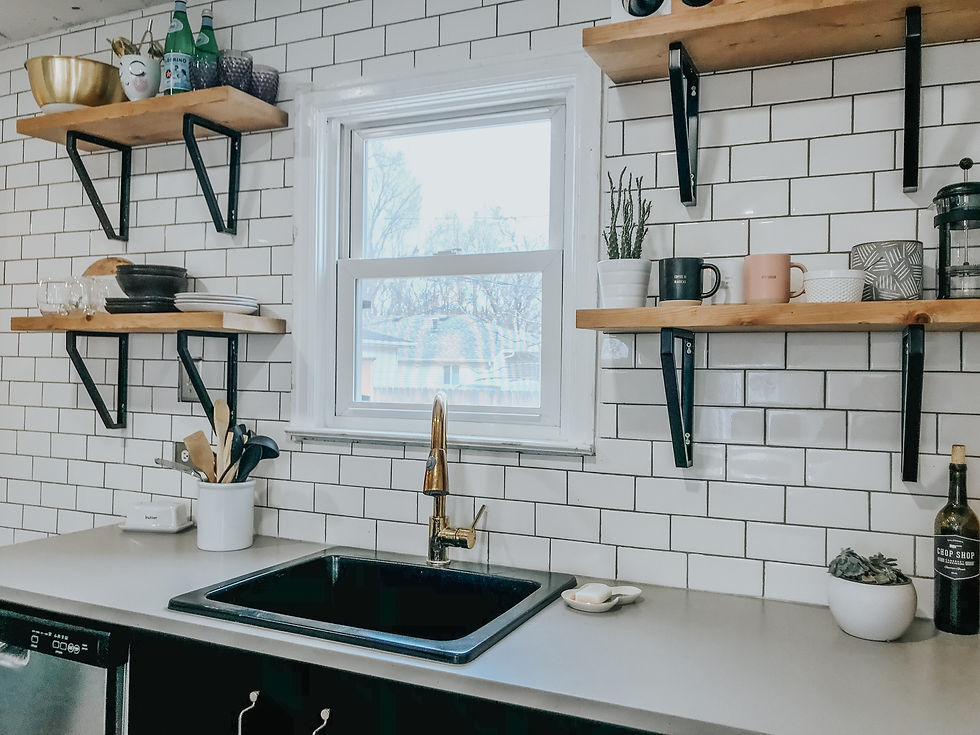
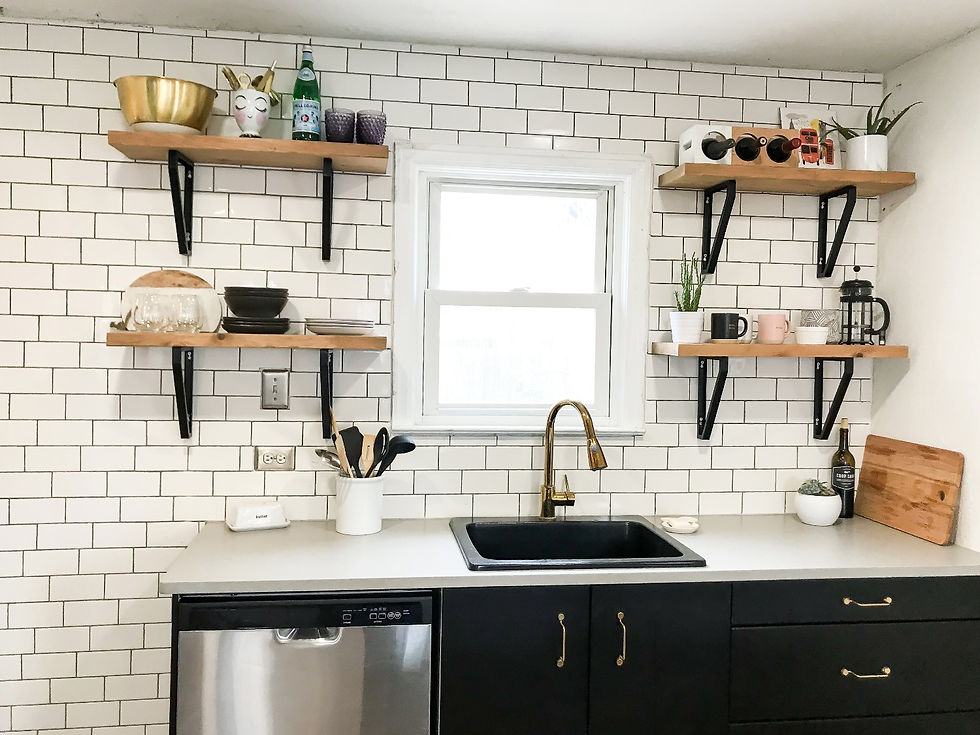
Can you believe these floors were underneath that tile all those years!? It was an INSANE refinishing job because they were in ROUGH shape but 100% worth it in the end! The tile and the shelves were DIY jobs which is where we saved the majority of our money! We also made sure to buy everything (including the appliances) during the Ikea Kitchen Event! I HIGHLY recommend doing this because it saved us close to $1000!
So if you're looking at designing an Ikea kitchen for yourself, here are few things you should do to make it your own:
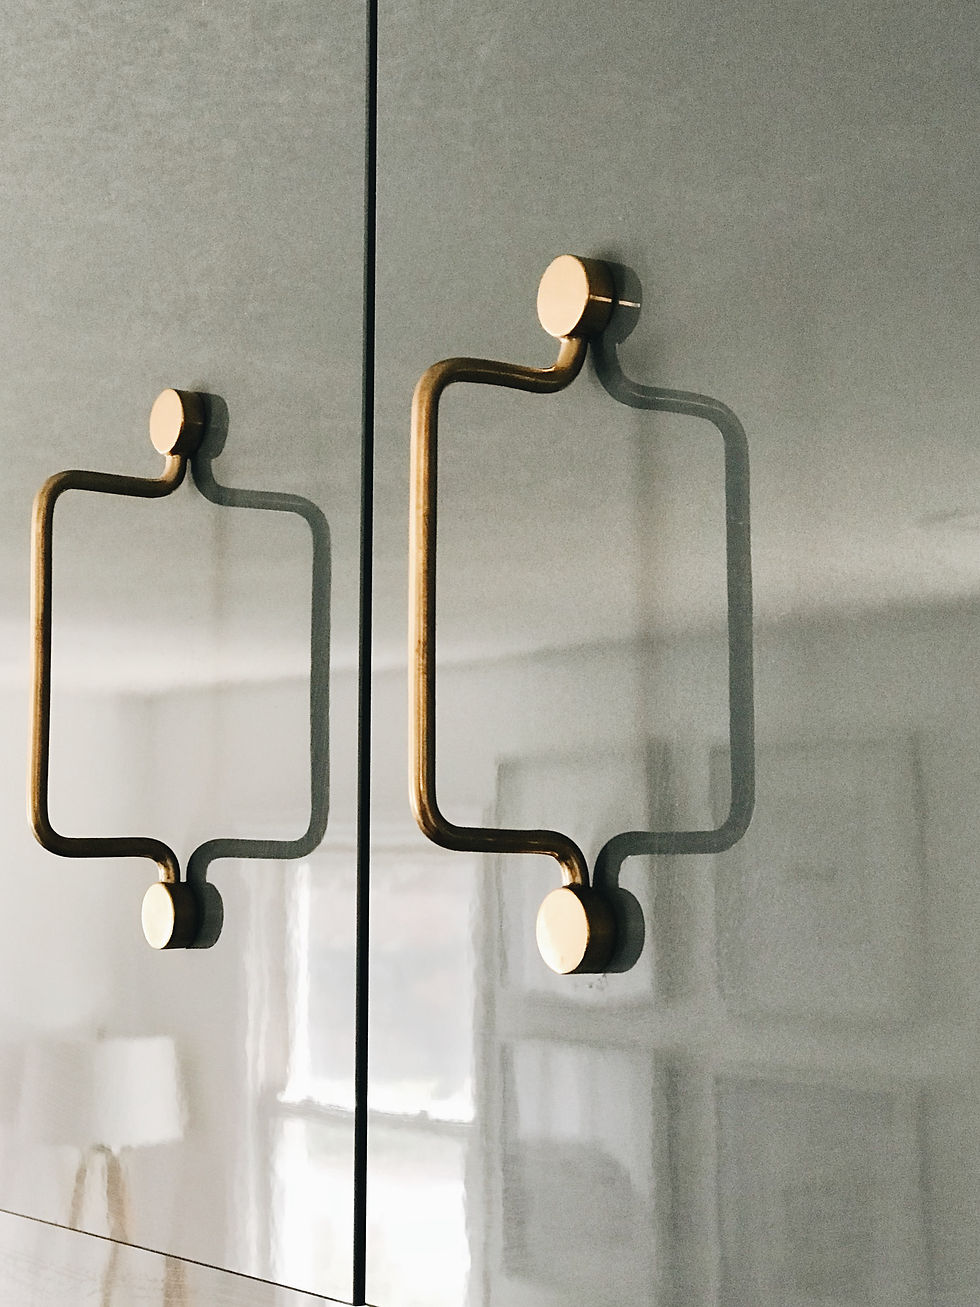
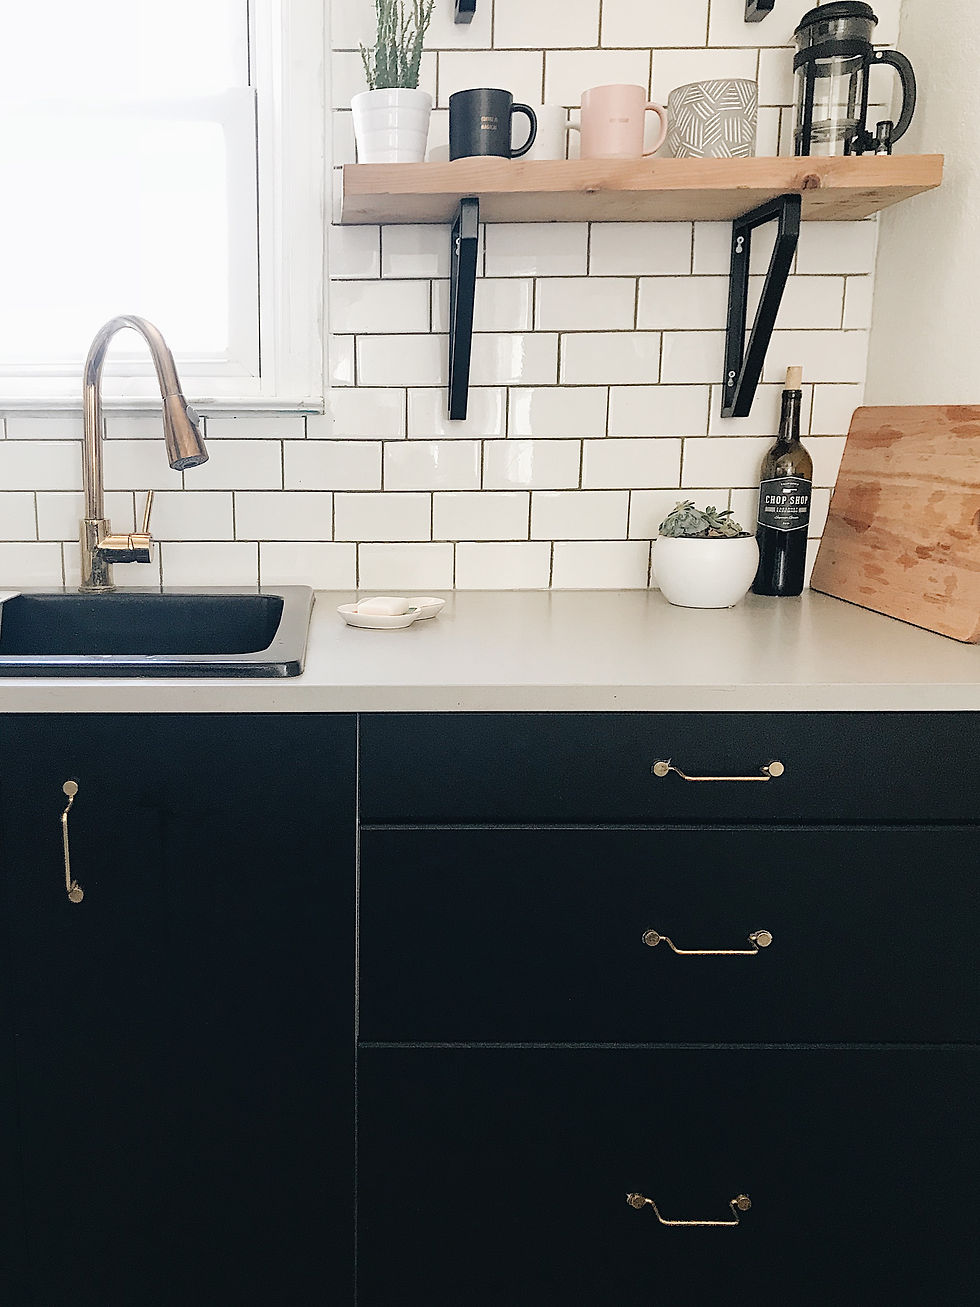
Splurge on Hardware
I am all about saving as much money as possible but there are some things that make or break a kitchen. The handles are something that you look at and use every single day and if you skimp there you'll always wish you hadn't. We are in LOVE with our wire handles *c/o Superfront. They added an element of style to the cabinets and gave them a unique, super luxe feel! They're sturdy and beautifully handmade and they made all the difference when it came to the entire design of the kitchen. Superfront is a Swedish company and they make all of their handles specifically for Ikea cabinets. They have tons of designs both modern and classic so if you want to make your Ikea kitchen your own I highly recommend them!
We used the same hardware on both the glossy teal and the matte black and they blended seamlessly while pulling the whole design together.
Pay for Installation
We didn't use the Ikea installation, we hired Idea Guy Assembly & Installation and they were AMAZING. I cannot say enough good things about them. They did the entire job in 3 days, charged less than Ikea did AND they were able to tackle all of the custom cuts to make the kitchen look professionally finished. If you're in the Denver area and looking at trying to do your Ikea kitchen yourself, I highly recommend giving them a call instead! They were worth every penny. If you're not in Denver, I still recommend not doing it yourself unless you are already an Ikea pro and you have plenty of time on your hands. We've built our fair share of furniture but this was a whole other ballgame. We estimated it would have taken us 2-3 weeks to do it ourselves so the time we saved having someone else do it and do it right was well worth the extra money. My advice is to add it to your original budget so that it doesn't freak you out when they spring it on you in the checkout line.
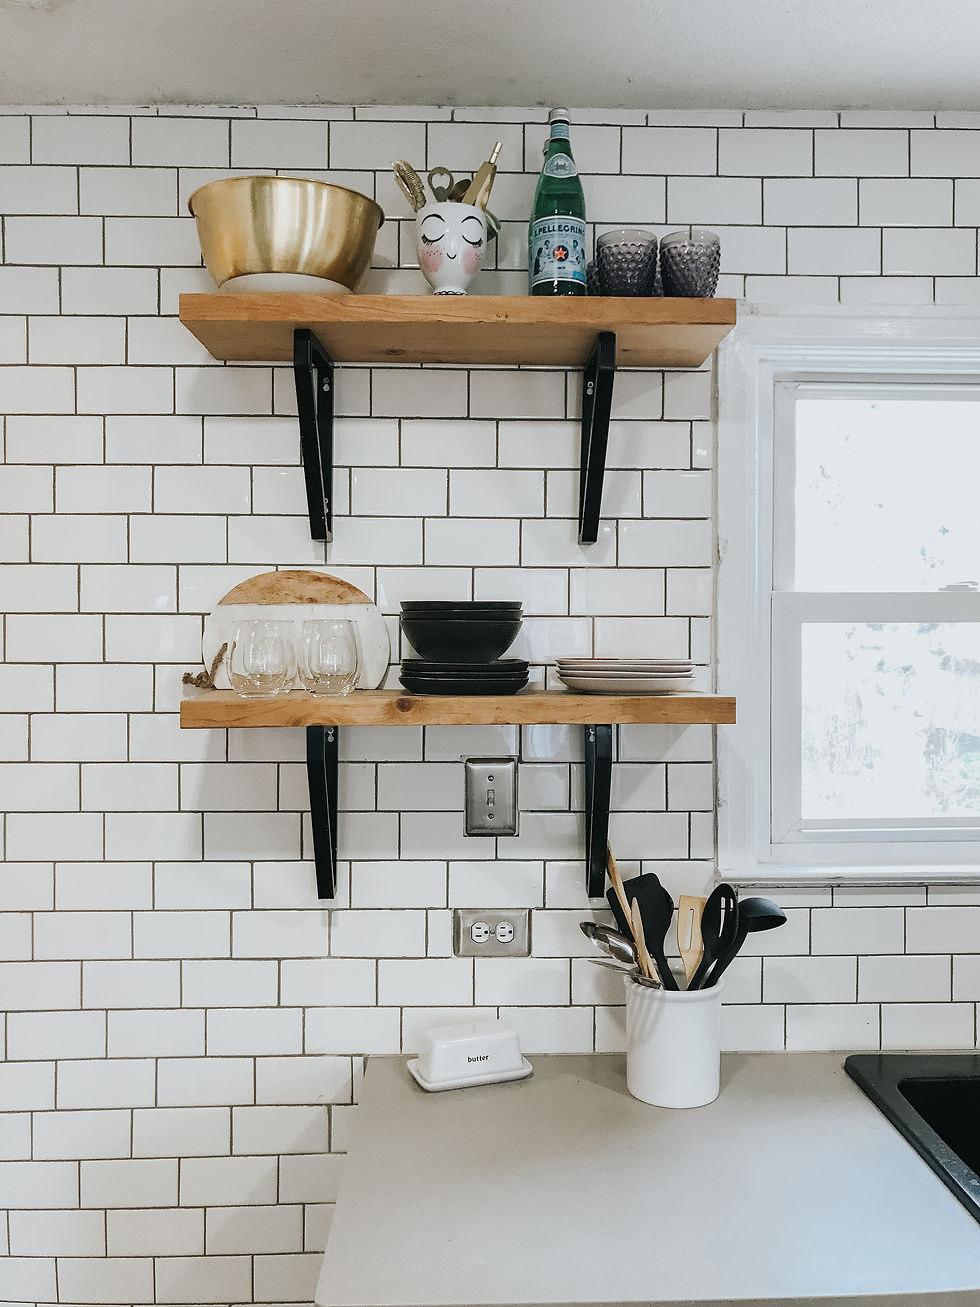
Open Shelving
The built in pantry and the drawer style cabinets ended up giving us so much storage and we were able to save a lot of money by doing the shelves instead of upper cabinets. They were super cheap and easy to build. They consisted of a long piece of wood from home depot that I had them cut into 4, and some metal Ikea brackets that I spray painted black. The scary part was definitely hanging them on the tile wall (we used this post as a guide) but I couldn't be happier with the finished product. I kept them functional but styled them up a bit by doing things like switching out our plastic mixing bowls for pretty gold ones and putting our instant coffee in a cute canister instead of the plastic container it comes in.


Don't Settle
I had a lot of asks for this small space and I wasn't willing to compromise. Even though I'm not a big fan of cooking, the kitchen is still the heart of the home (and you see ours as soon as you walk in the front door). The kitchen designer at Ikea kept telling me that this wouldn't work, or we don't have enough space for that, or am i sure I want two different colors of cabinets? But I knew what I wanted and I wasn't going to be bullied into settling just because it might take some "custom cuts". It was a lot of work, and it took a really long time - especially because we had some financial obstacles that we needed to address before we could purchase the countertops. We had cardboard countertops for a while but it was so worth it in the end!
Have you ever renovated a kitchen? What tips do you have for a couple of rookies like us??
If you loved this post please share it using the links below! It's so appreciated!


Comments